
Autumn is the perfect time to refresh your nail art with cozy hues and playful designs. This collection of 16 simple and cute fall nail art designs is crafted to inspire your creativity. Whether you’re a nail art beginner or a seasoned pro, these ideas are designed to spark your imagination and help you achieve a fresh seasonal update. Enjoy step-by-step instructions and vivid descriptions that guide you through each design, ensuring your nails reflect the warmth and charm of the fall season.

1. Pumpkin Spice Perfection
Step-by-step
- Start with a warm, neutral base coat that reminds you of a crisp fall day.
- Add a bold orange accent on one nail using a small brush.
- Create tiny white details to mimic the spice’s playful twist.
- Finish with a glossy top coat to lock in your design.

Picture this: Imagine your nails glowing with a rich, pumpkin spice tone that stands out against a cool autumn backdrop. The vibrant orange pop against a gentle neutral base creates a playful contrast. Each nail becomes a tiny work of art, capturing the cozy spirit of fall.
2. Rustic Leaves Nail Art
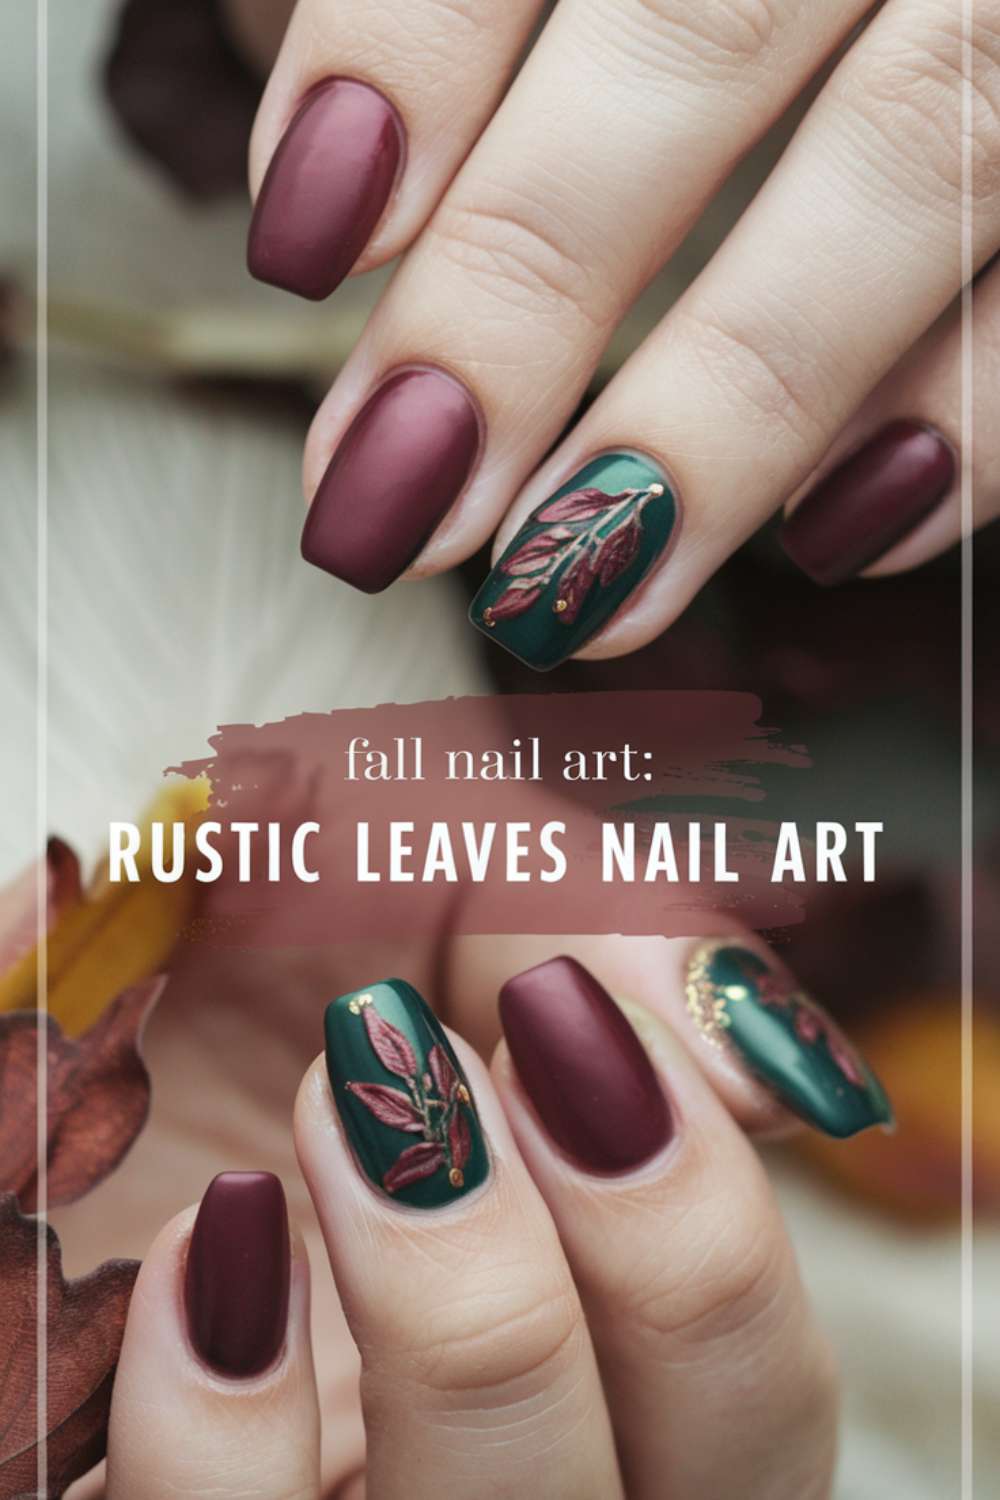
Step-by-step
- Begin with a deep burgundy or forest green base.
- Using a fine brush, sketch out delicate fall leaves in contrasting shades.
- Add subtle gold accents for a touch of elegance.
- Seal your design with a protective top coat.
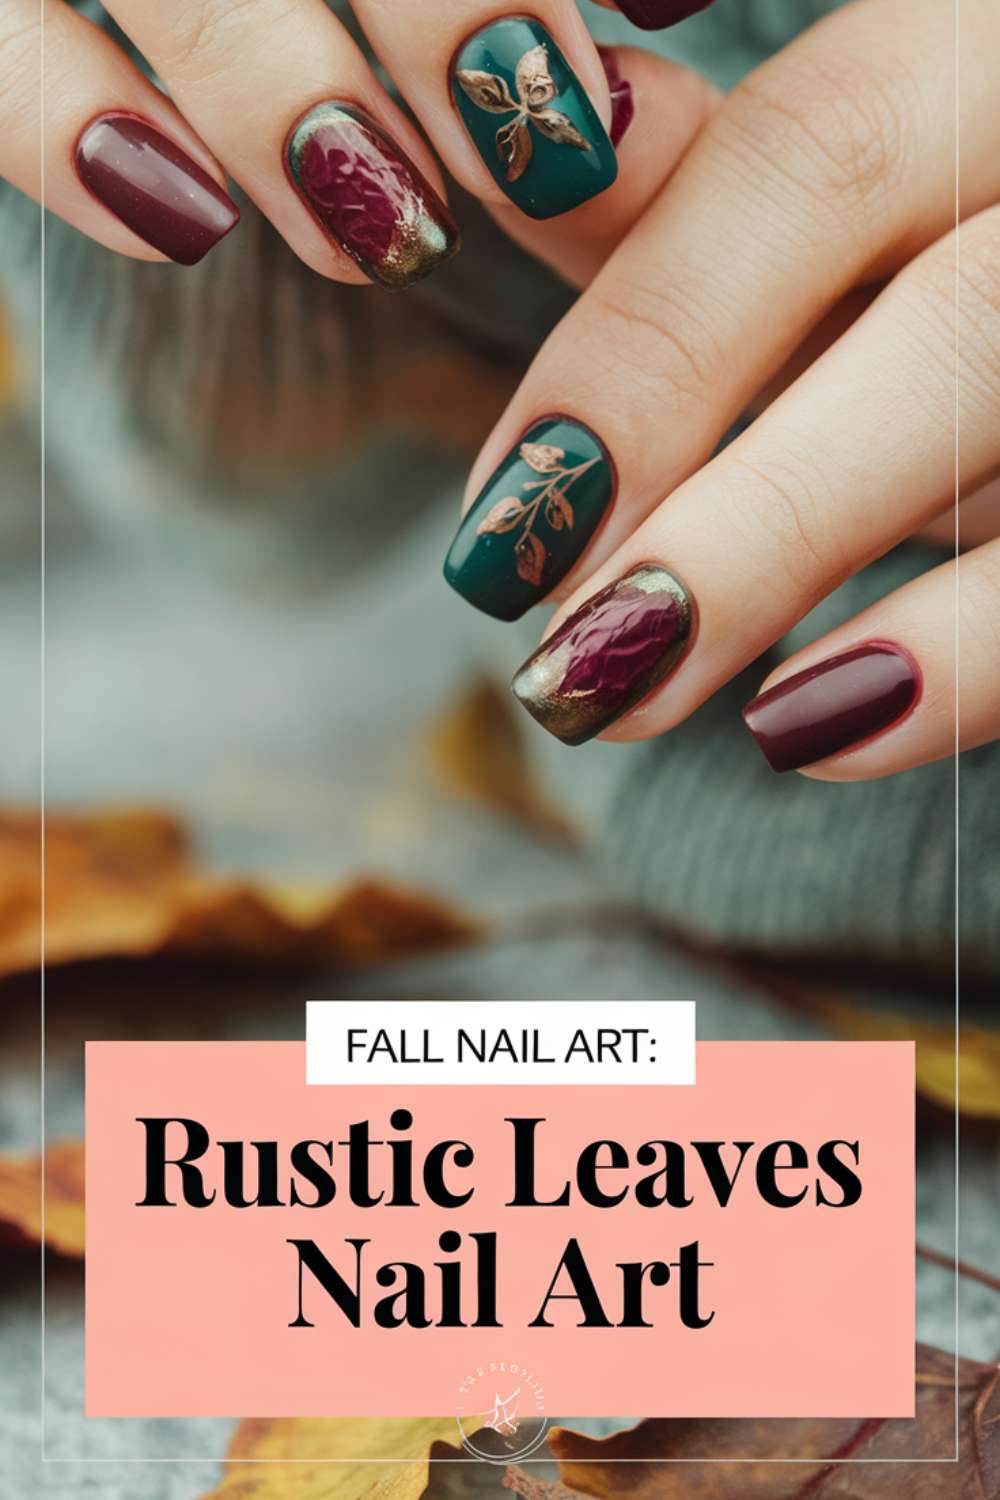
Picture this: Visualize your nails as a canvas filled with rustic fall leaves gently drifting in an autumn breeze. The interplay of deep colors with hints of gold reflects the season’s natural beauty. Each detail evokes the charm of a serene forest during the fall.
3. Golden Harvest Glow
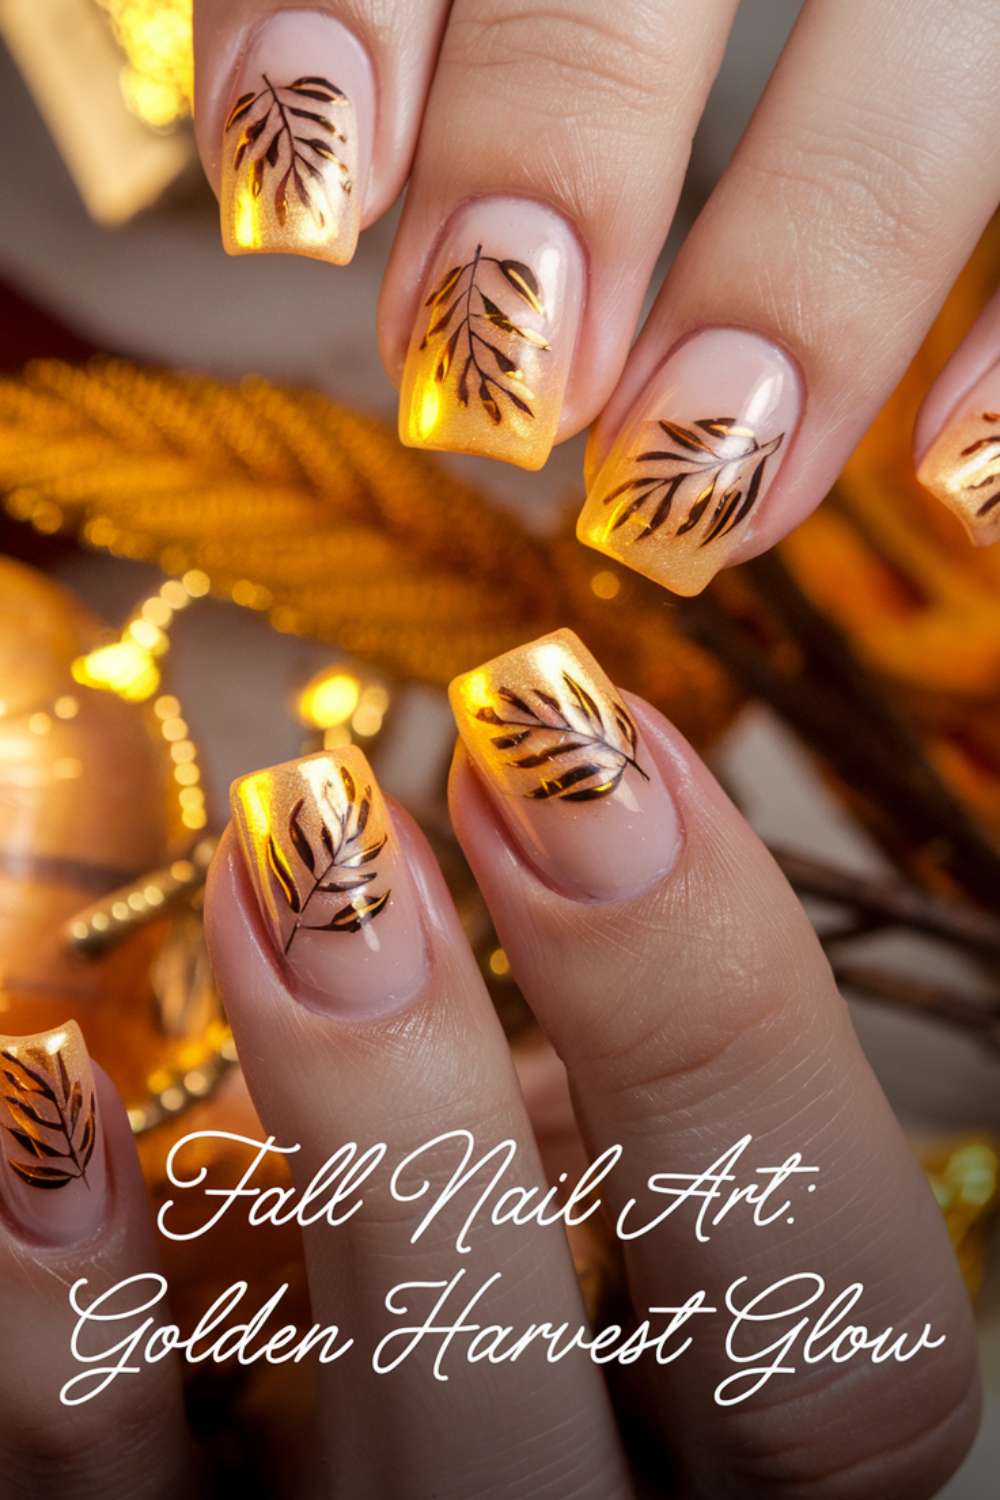
Step-by-step
- Apply a shimmering gold base to create a radiant glow.
- Use a fine tip to draw minimalist fall leaves in a complementary shade.
- Enhance the design with a few soft, blended lines.
- Top it off with a clear gloss to enhance the sparkle.

Picture this: Envision your nails bathed in a warm golden hue, reminiscent of a sunlit autumn harvest. The minimalist leaf details add a delicate charm that draws attention to the overall glow. Your nails capture the essence of a golden fall afternoon, exuding both warmth and elegance.
4. Autumn Ombre Elegance
Step-by-step
- Start with a light neutral polish.
- Blend in a gradient of deep reds and burnt oranges on each nail.
- Use a sponge to create a smooth transition between colors.
- Finish with a clear top coat for a polished look.
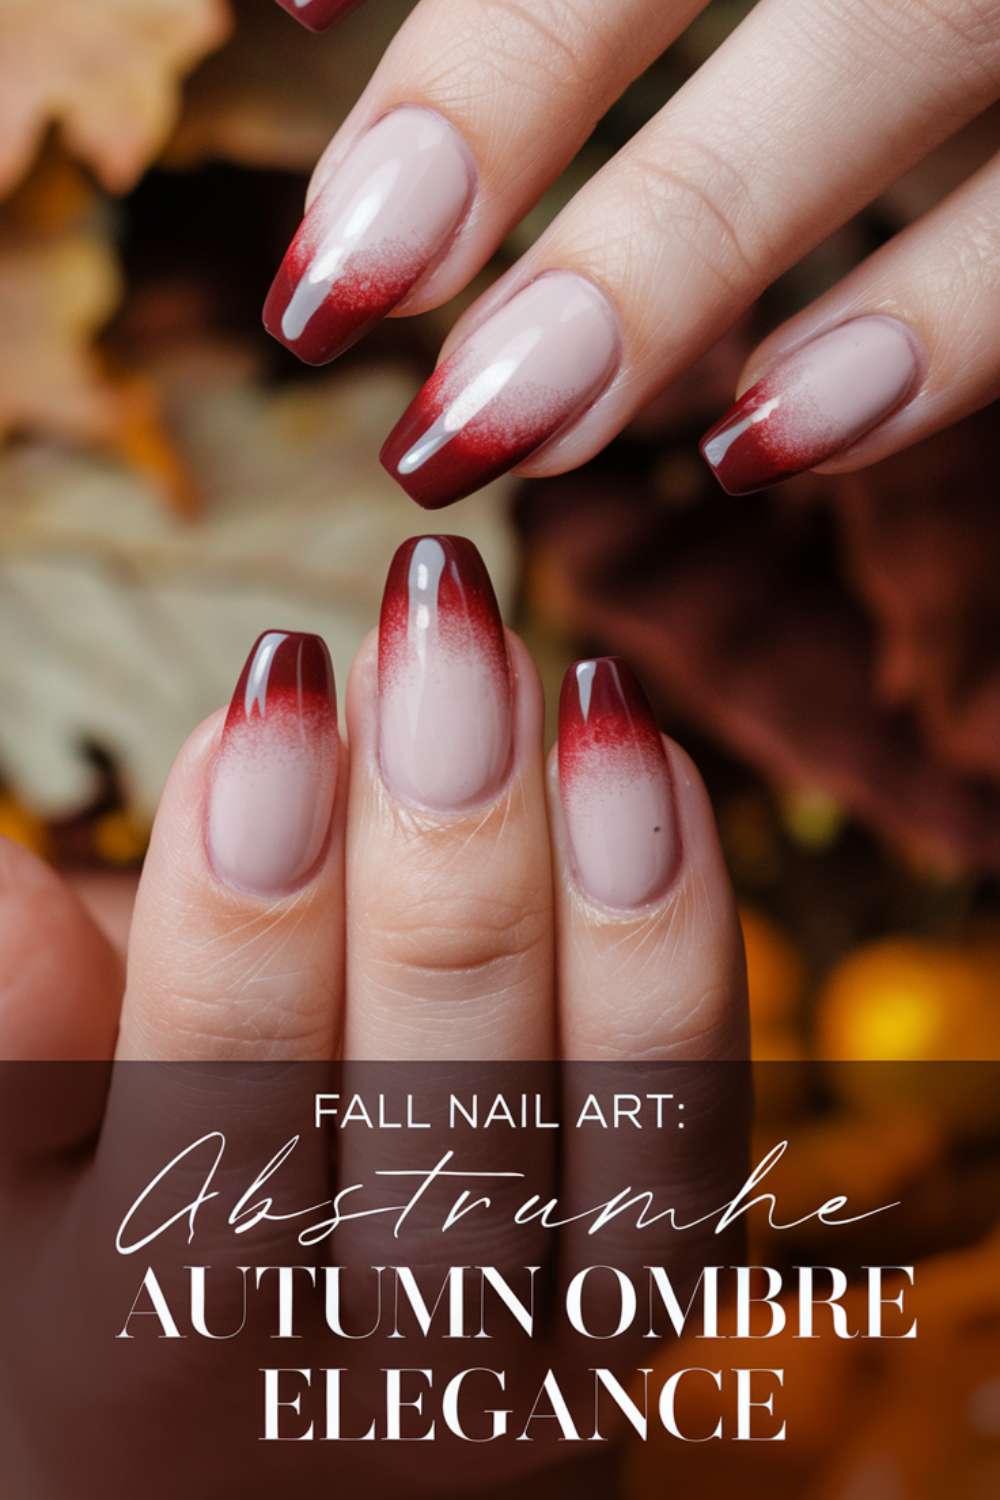
Picture this: Picture your nails transforming into a stunning ombre masterpiece that mirrors the changing fall foliage. The seamless blend of reds and oranges creates a captivating transition from light to dark. Each nail reflects the elegant unpredictability of autumn’s color palette.
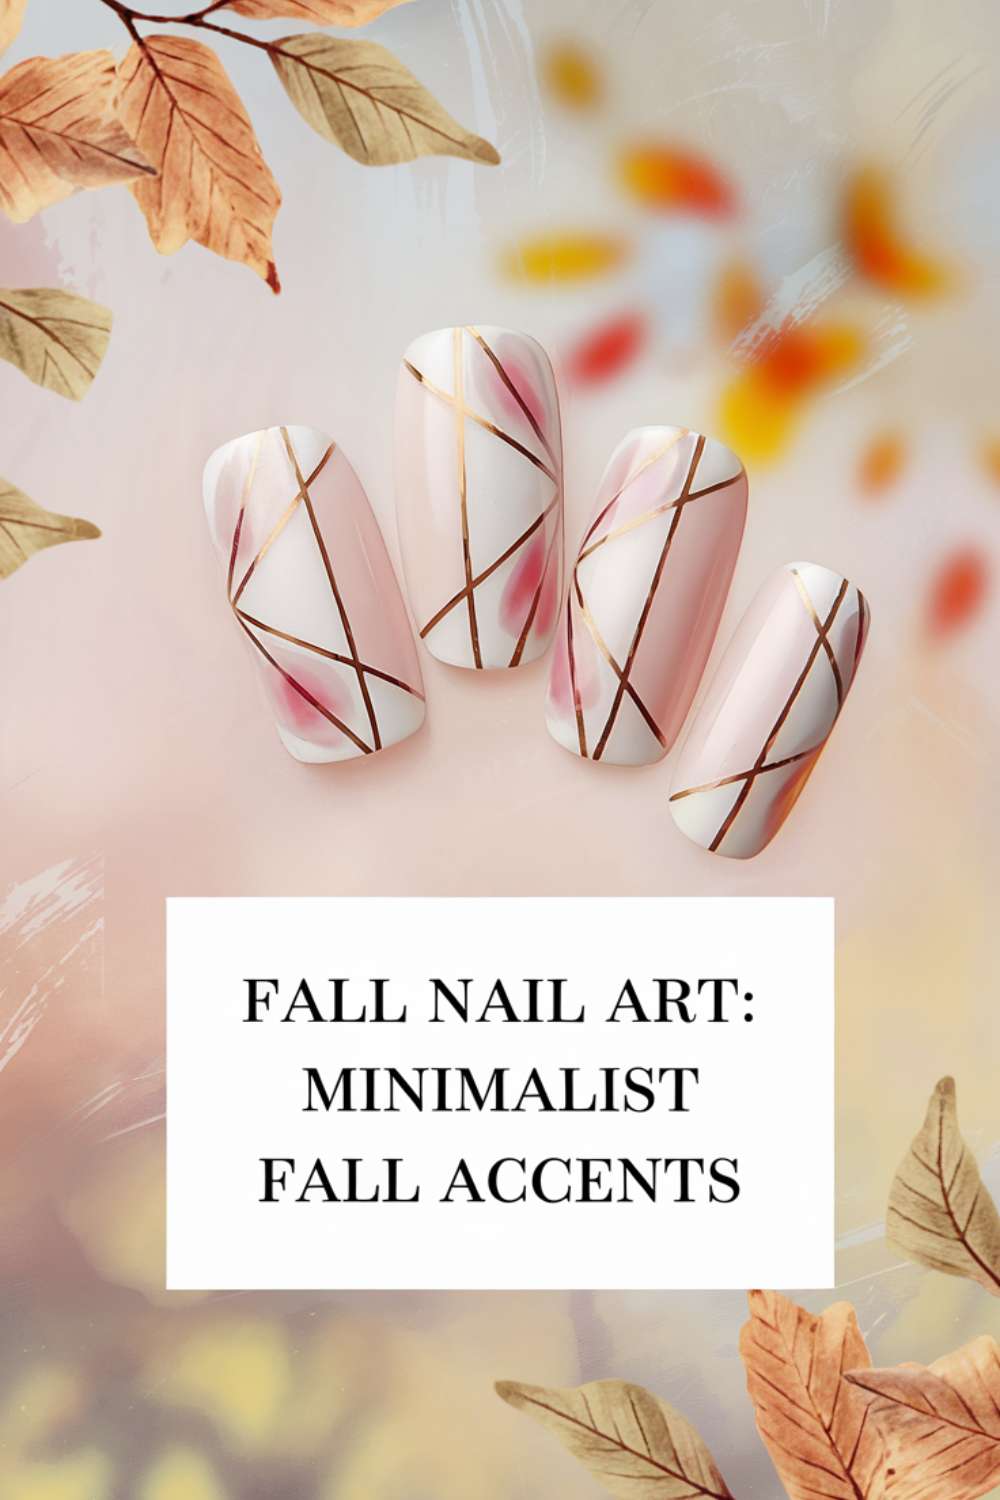
5. Minimalist Fall Accents

Step-by-step
- Choose a soft, pastel base that hints at the season’s gentle tones.
- Add simple geometric lines or dots in a darker shade.
- Create balance by spacing the designs evenly.
- Seal the look with a clear, high-shine top coat.
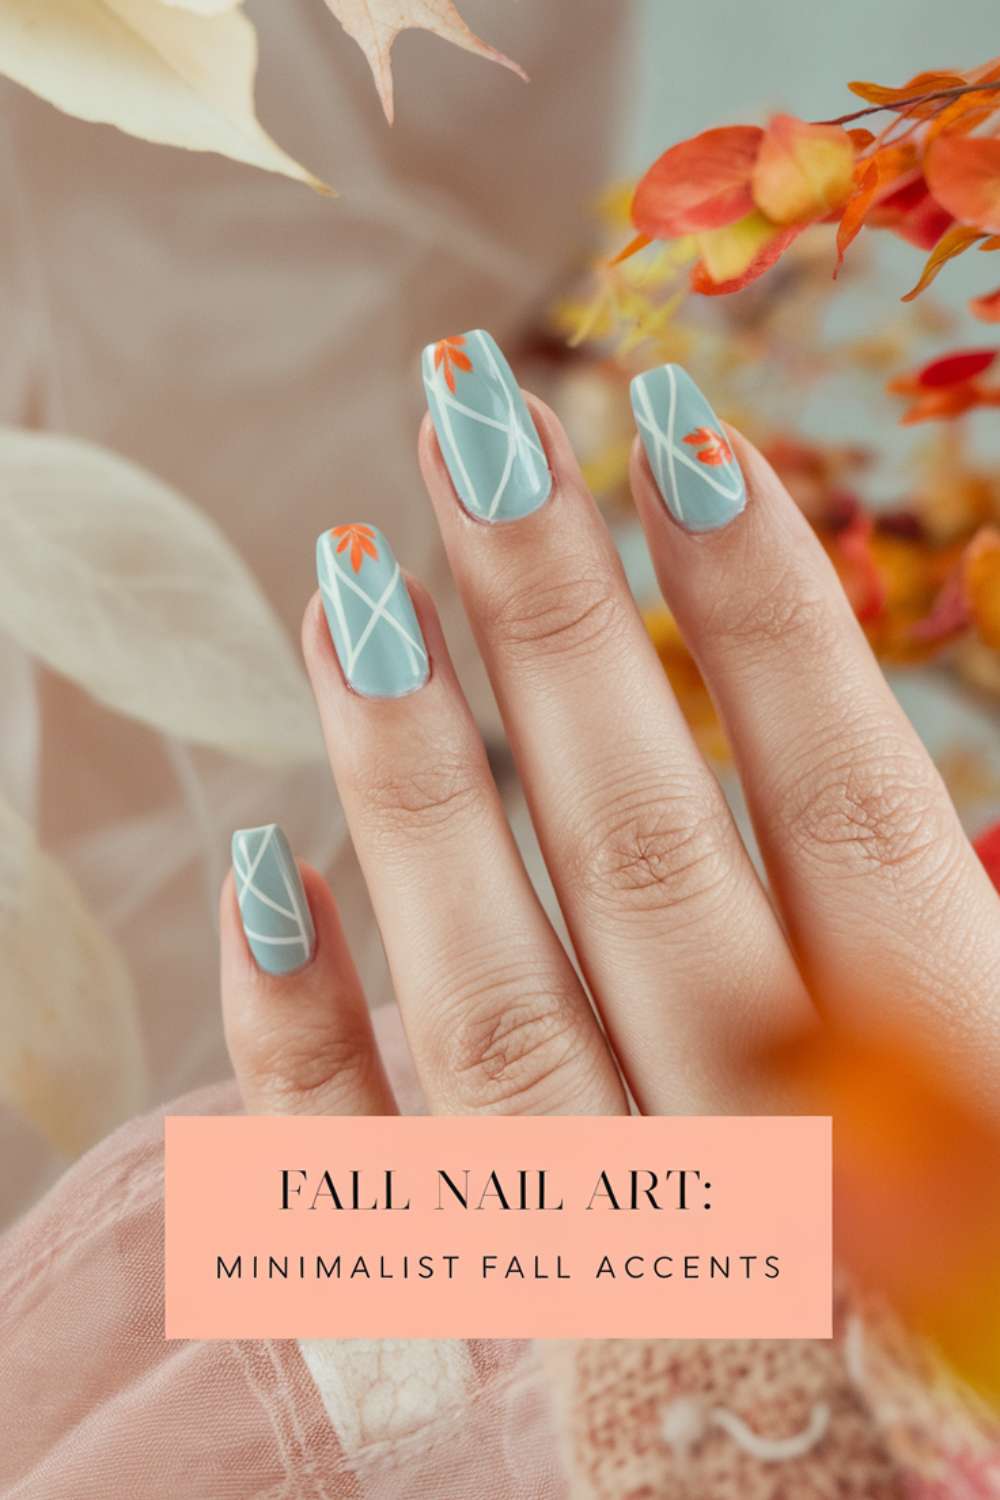
Picture this: Imagine your nails featuring understated yet chic accents that speak to the minimalist trend of the season. The soft base paired with precise, dark lines exudes refined simplicity. Every nail feels like a subtle nod to the understated beauty of fall.
6. Cozy Knit Sweater Nails
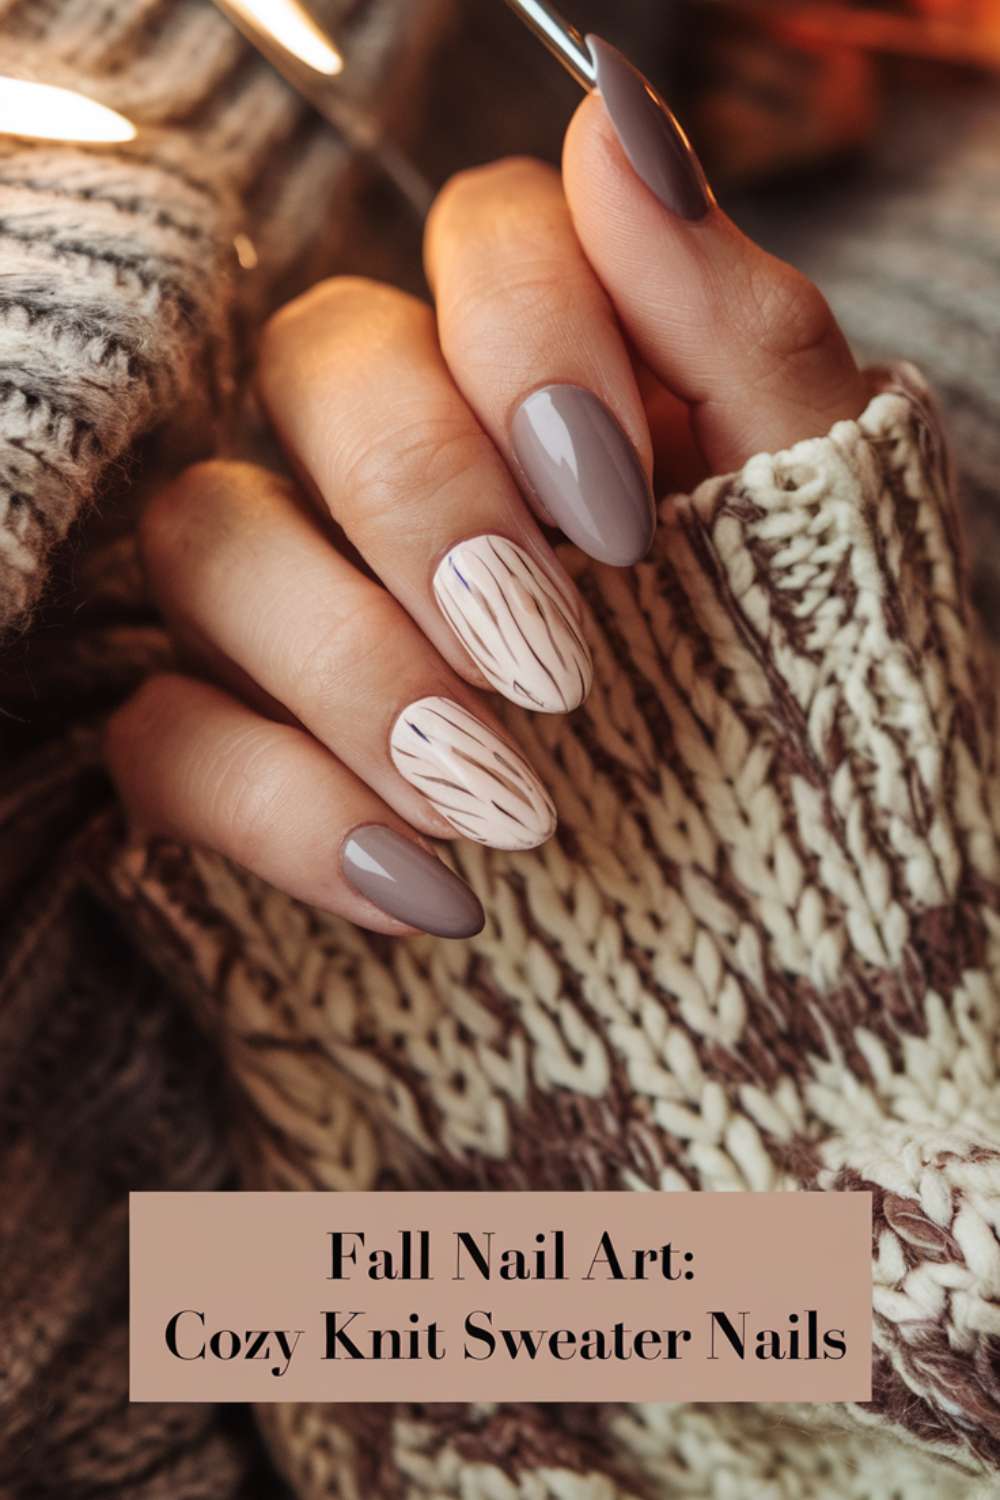
Step-by-step
- Apply a muted cream or light brown as your base.
- Using a fine brush, create a knit pattern reminiscent of a warm sweater.
- Add hints of darker browns and subtle textures.
- Complete the design with a protective top coat.

Picture this: Visualize your nails as a miniature work of art, echoing the cozy warmth of a knit sweater on a chilly autumn day. The intricate pattern feels both comforting and stylish. Each nail tells a story of fall comfort and classic style.

7. Spiced Cider Swirl

Step-by-step
- Begin with a base of deep maroon.
- Swirl in touches of cinnamon and caramel hues using a thin brush.
- Create a soft, swirling pattern across your nails.
- Lock in the design with a clear top coat.

Picture this: Imagine your nails swirling with the rich, spiced colors of a freshly brewed cider. The maroon base contrasts beautifully with the warm, caramel swirls. Each nail captures the essence of a cozy, spice-filled autumn evening.
8. Crisp Apple Orchard
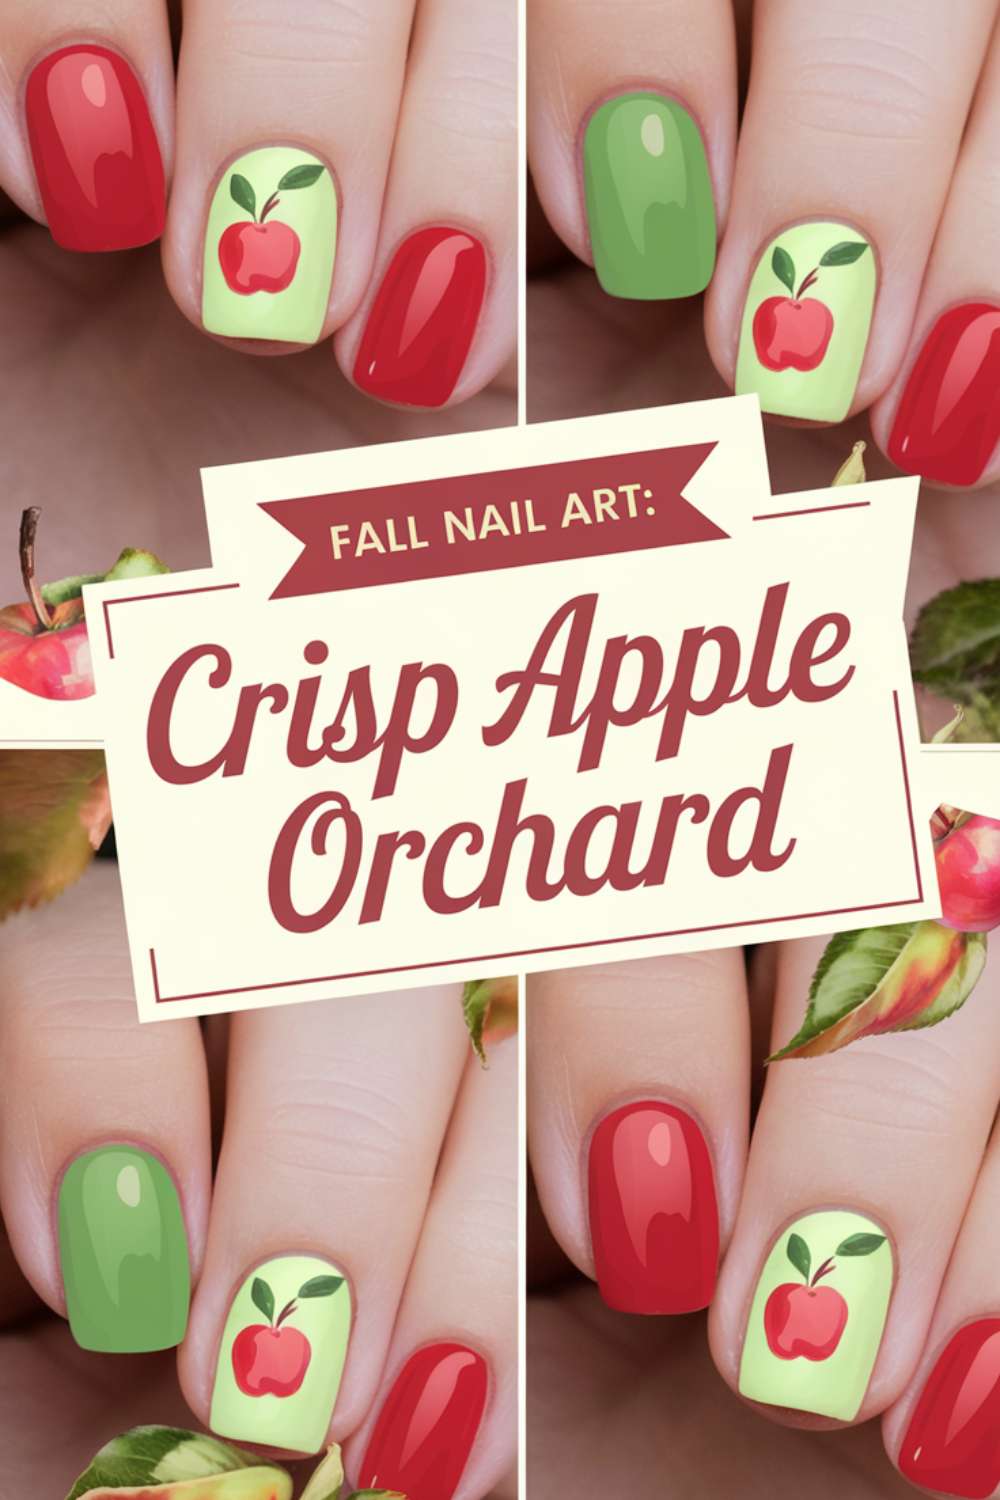
Step-by-step
- Start with a vibrant red or apple green base.
- Outline simple apple shapes with a fine brush.
- Add tiny leaves in a lighter, complementary tone.
- Finish with a glossy top coat to accentuate the design.
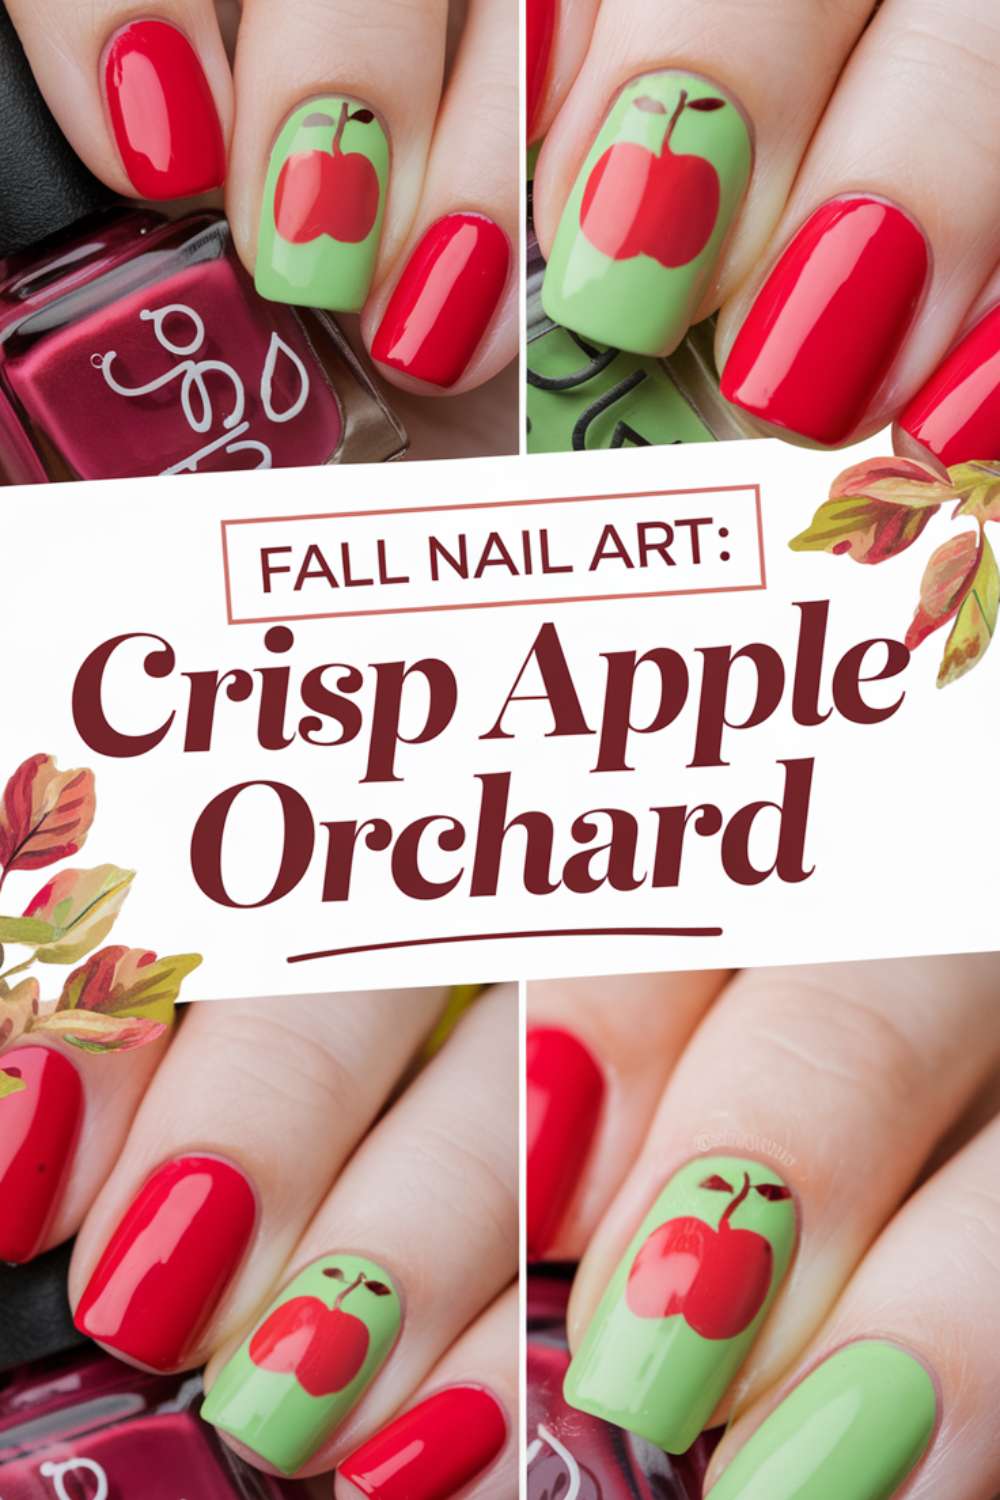
Picture this: Picture your nails echoing the refreshing spirit of an apple orchard in full bloom during the fall. The bright red or green base provides a bold backdrop for the playful apple outlines. Each nail bursts with the freshness and vitality of a crisp autumn harvest.
9. Elegant Walnut Woods
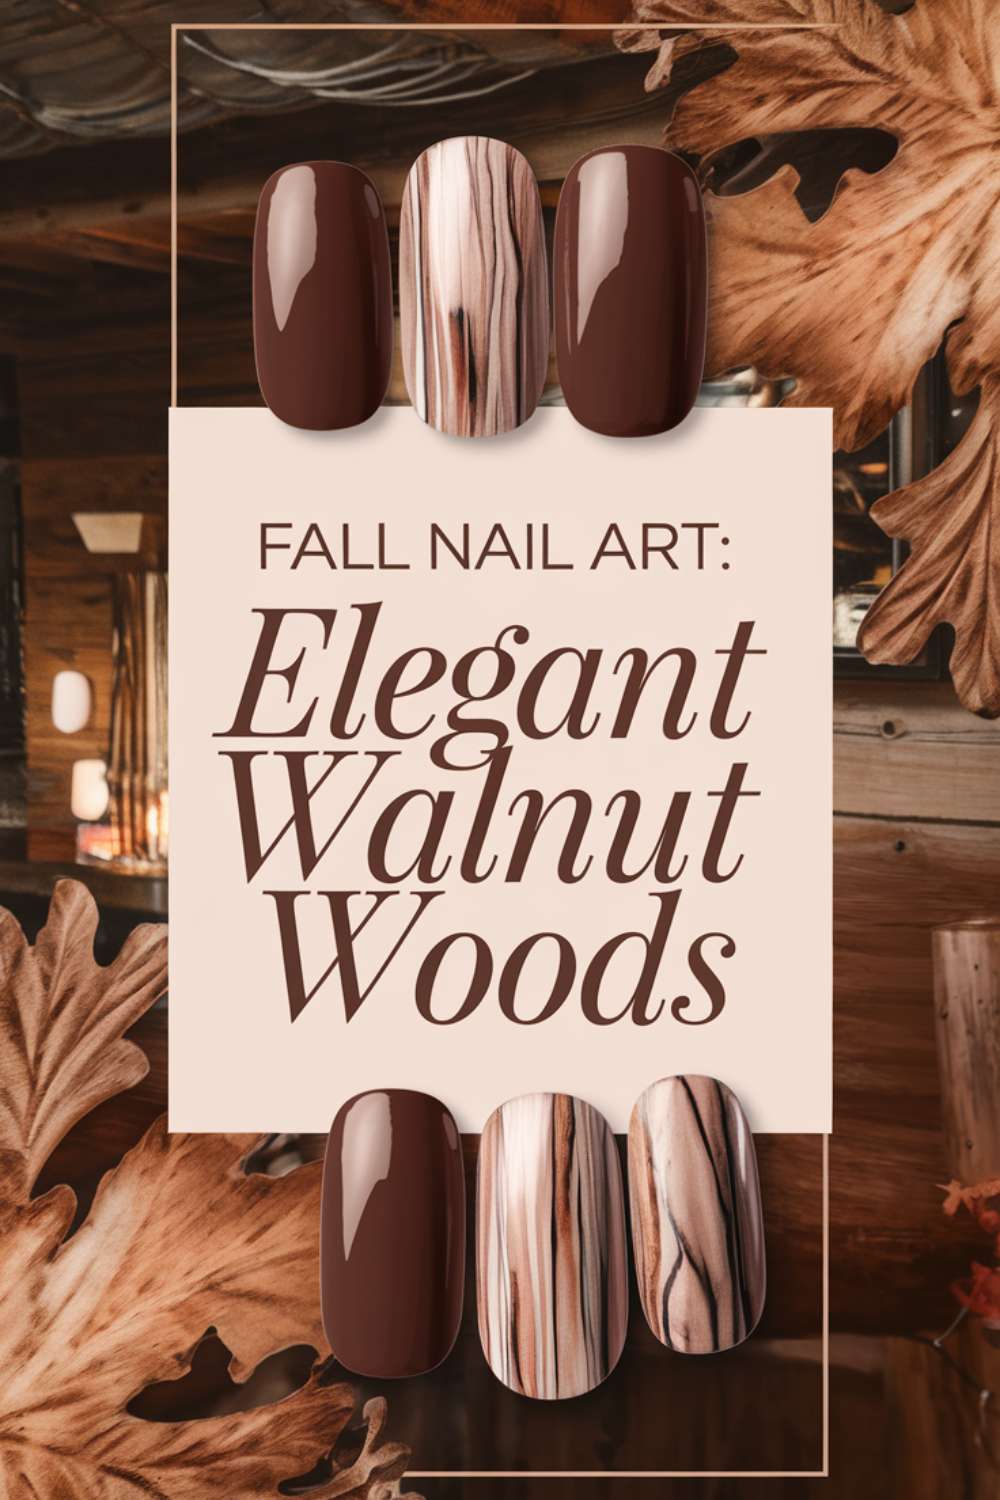
Step-by-step
- Use a deep, chocolate brown as your base.
- Create a subtle woodgrain texture with thin, flowing lines.
- Accent with a hint of metallic shimmer for depth.
- Seal with a clear top coat for a polished finish.

Picture this: Envision your nails resembling the rich, layered textures of a walnut wood floor in a cozy cabin. The deep brown base coupled with delicate woodgrain details evokes a sense of rustic elegance. Each nail becomes a timeless piece of art, echoing the warmth of a fall woodland retreat.
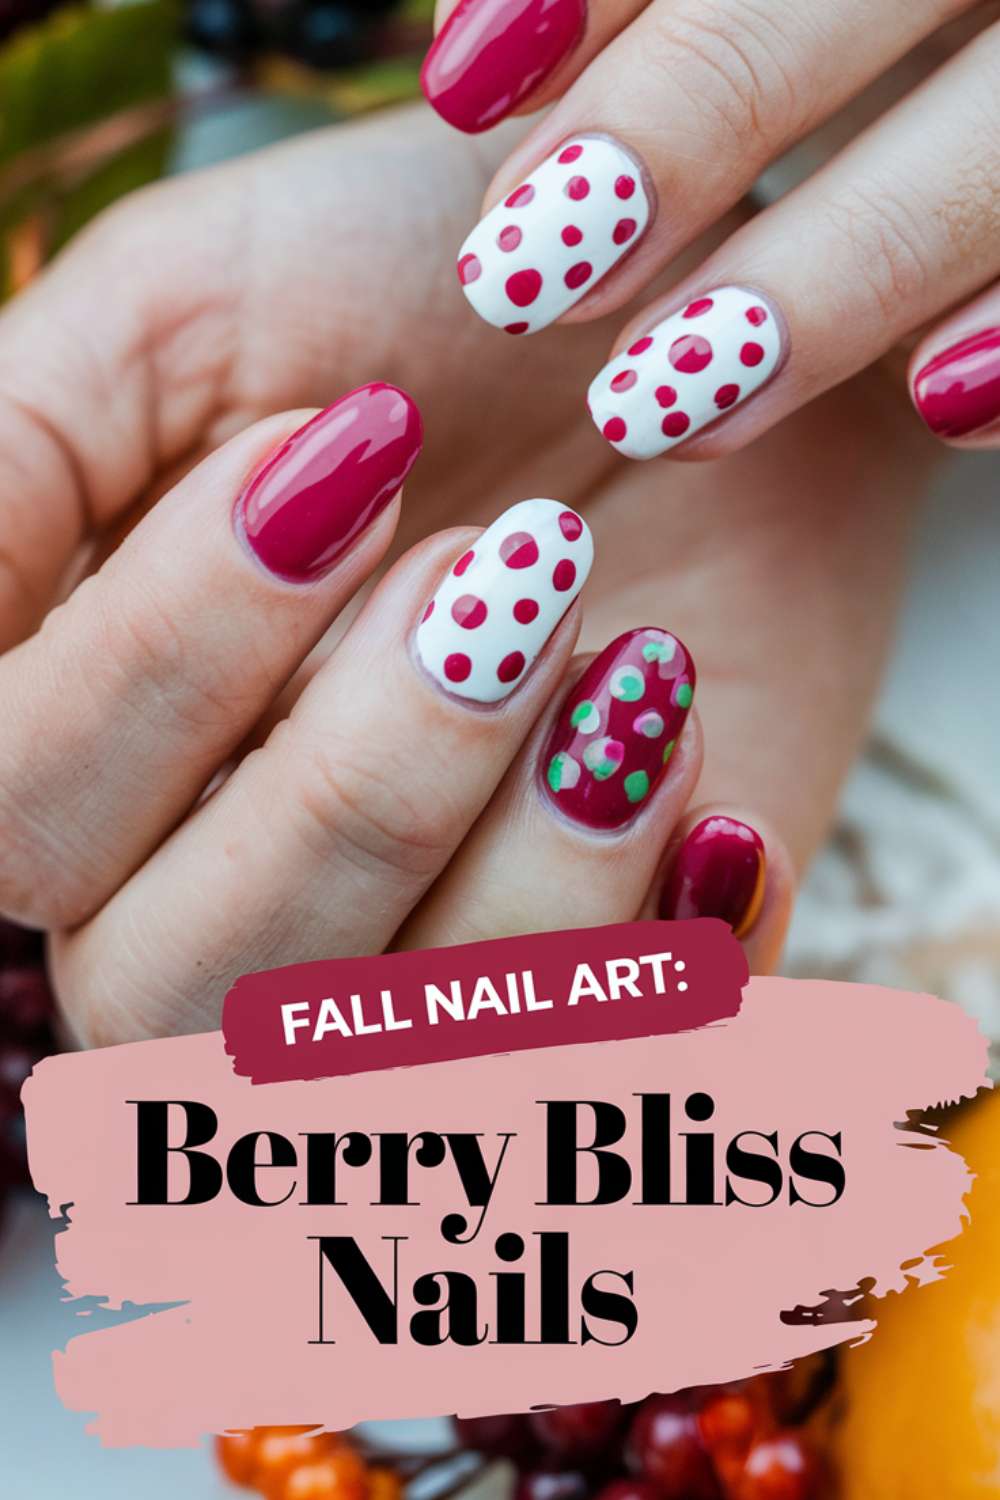
10. Berry Bliss Nails
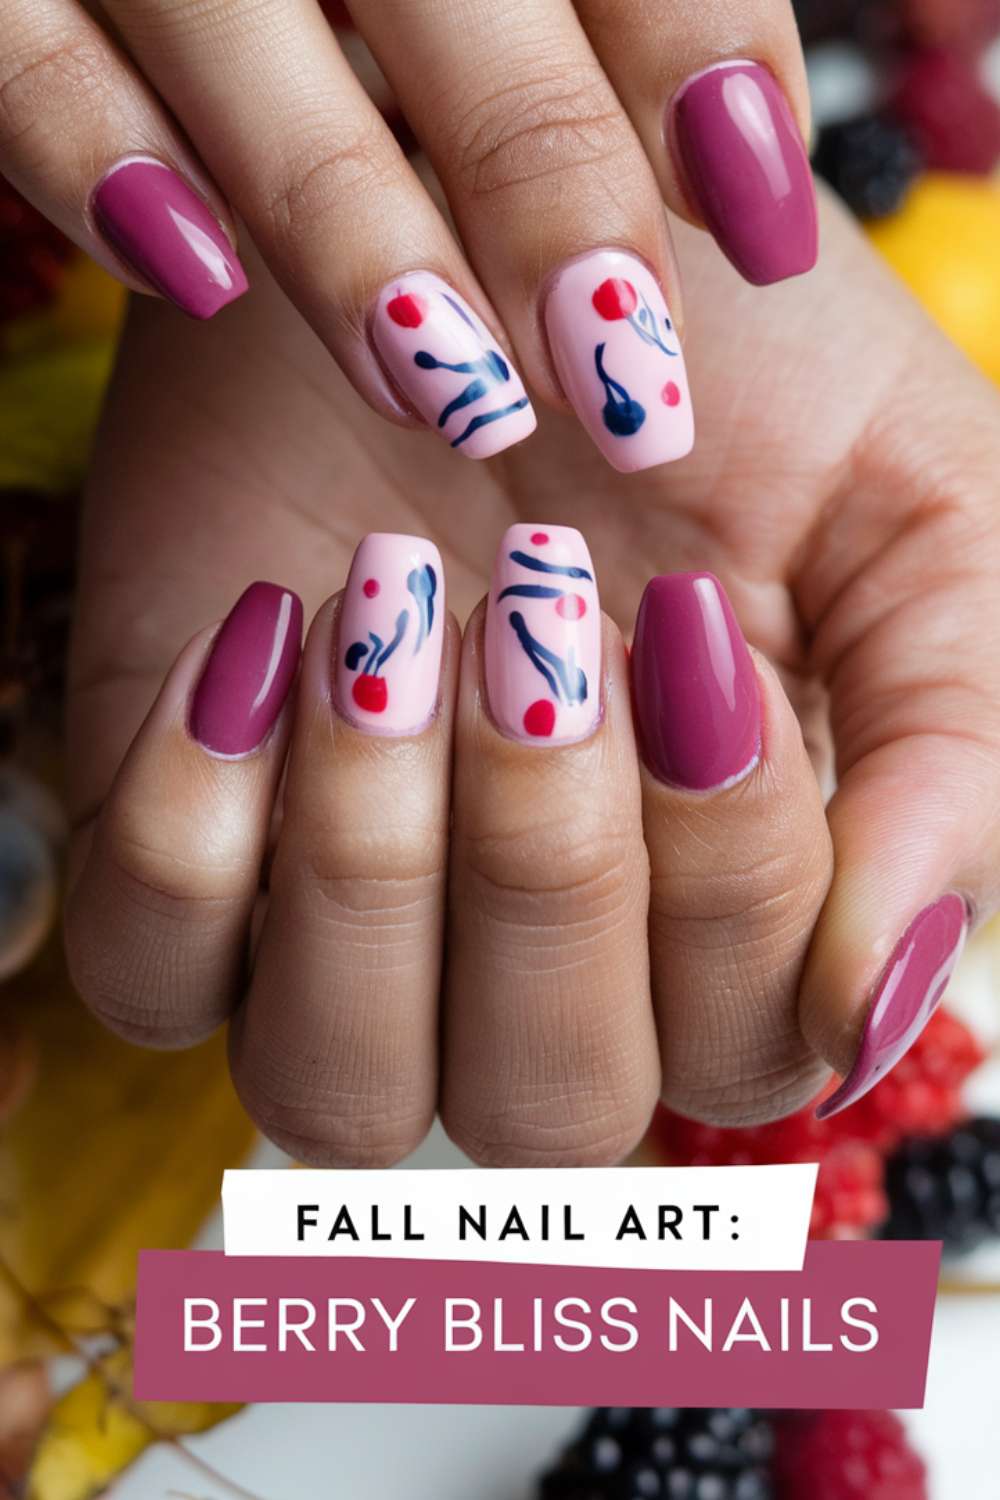
Step-by-step
- Start with a bold berry-colored base.
- Add delicate white or light pink polka dots for a playful touch.
- Enhance with tiny accent lines for extra detail.
- Top with a clear gloss to highlight the design.
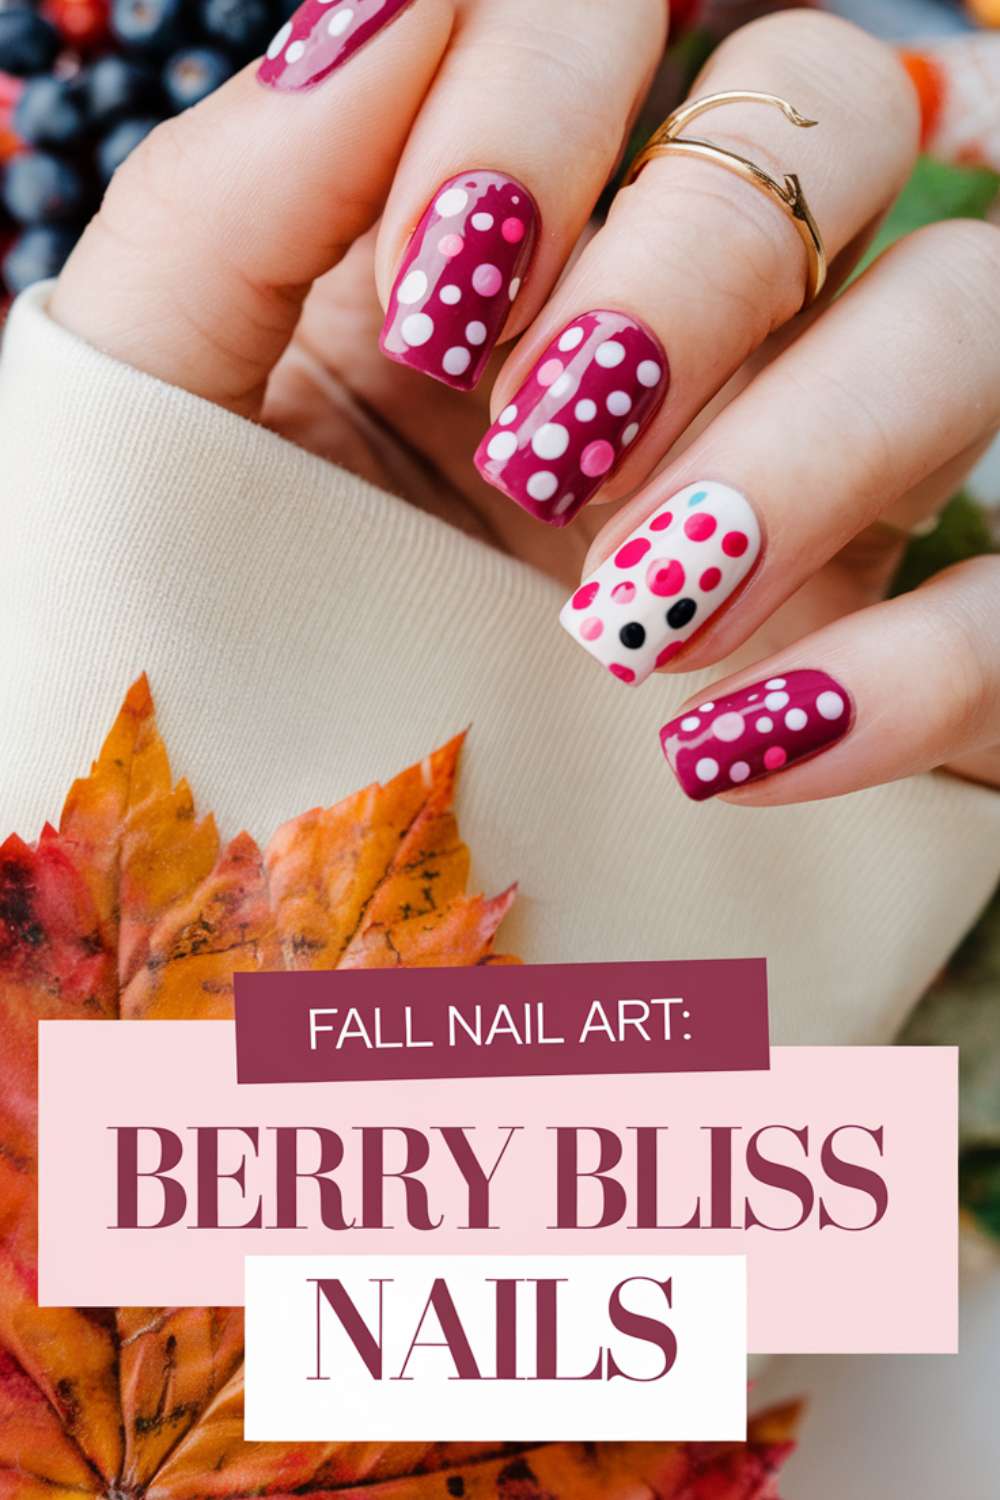
Picture this: Imagine your nails bursting with the vibrant allure of fresh berries on a cool autumn day. The bold berry base is complemented by whimsical polka dots that add a fun twist. Each nail feels lively and refreshing, perfect for a playful fall look.
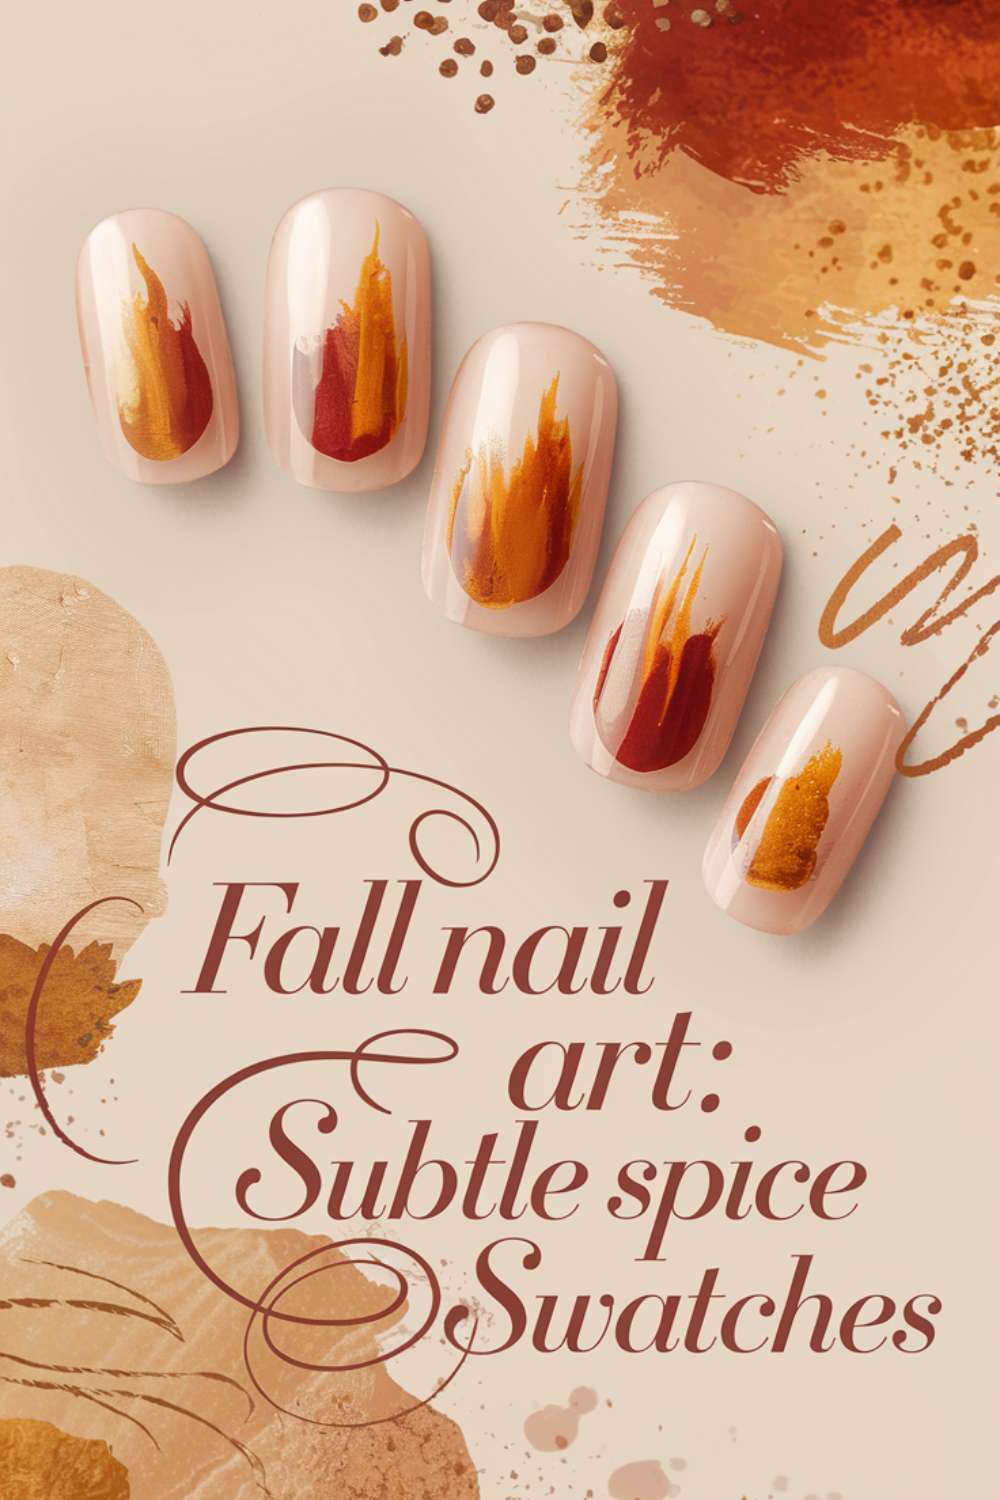
11. Subtle Spice Swatches
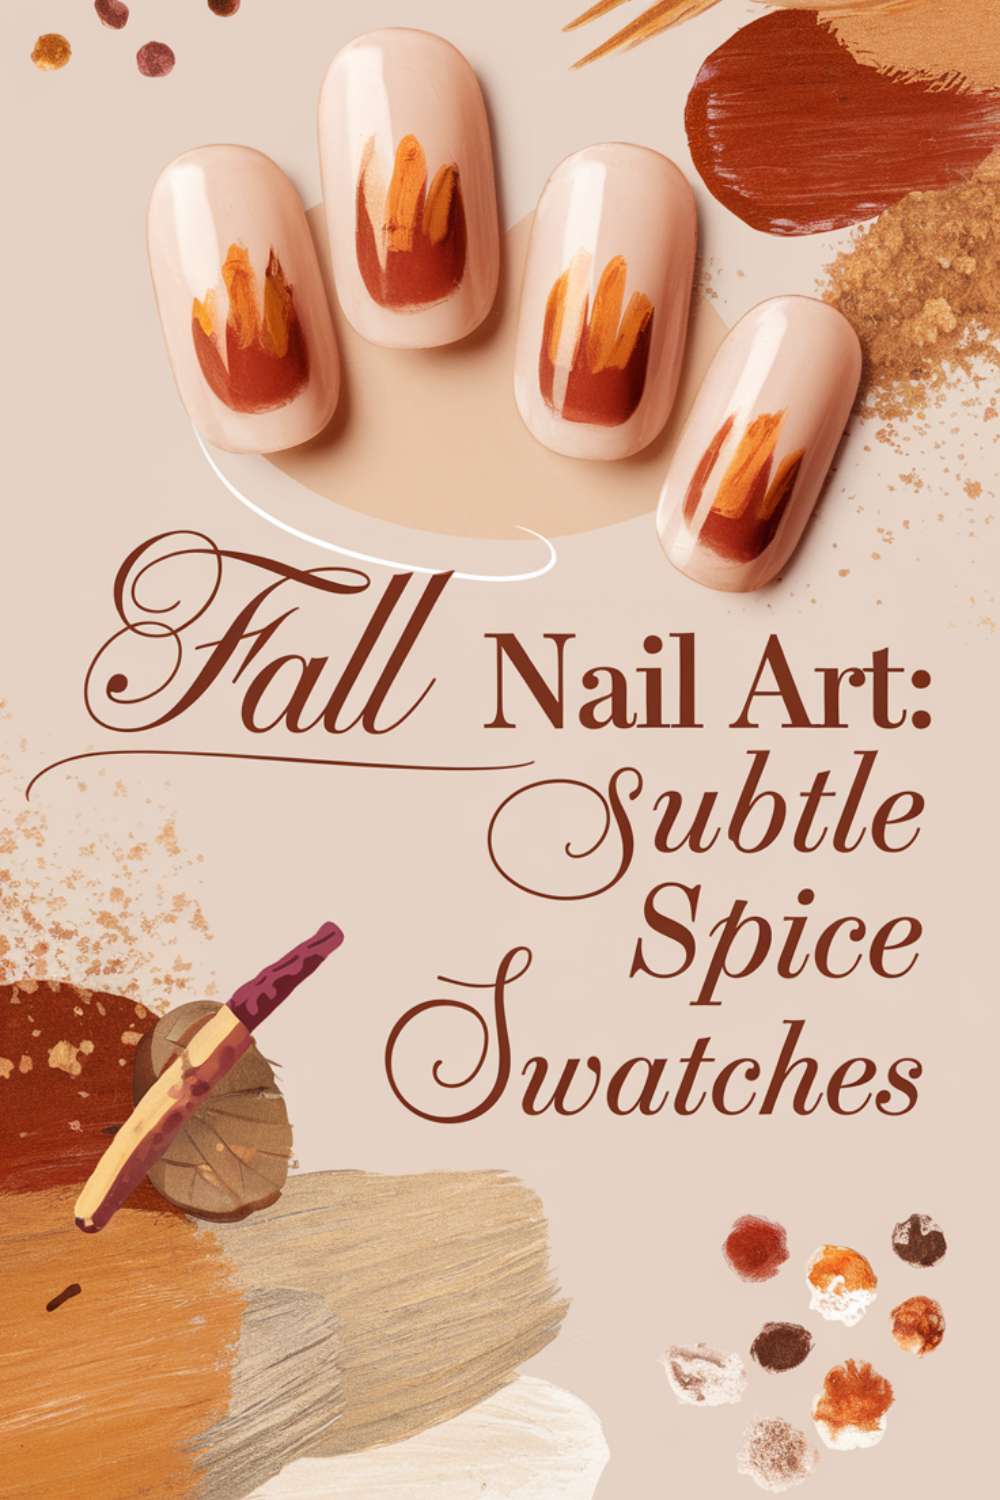
Step-by-step
- Apply a soft beige or taupe as your base.
- Create small, scattered patches of warm spice colors.
- Use a sponge to blend the patches seamlessly.
- Finish with a high-gloss top coat for a smooth finish.
Picture this: Picture your nails as a delicate canvas showcasing an array of warm spice swatches. The soft base contrasts beautifully with the vivid spice patches, creating an artistic yet understated look. Each nail radiates a subtle, sophisticated charm that is both modern and timeless.
12. Copper Leaf Accents
Step-by-step
- Begin with a deep navy or dark green base.
- Use copper polish to paint detailed fall leaves on each nail.
- Enhance with tiny glitter accents to add sparkle.
- Seal with a clear top coat for durability.

Picture this: Visualize your nails adorned with intricate copper leaf accents that shimmer under soft light. The deep base creates a dramatic contrast, making the copper details truly pop. Each nail feels like a celebration of the rich textures and hues found in nature during autumn.
13. Warm Caramel Drizzle
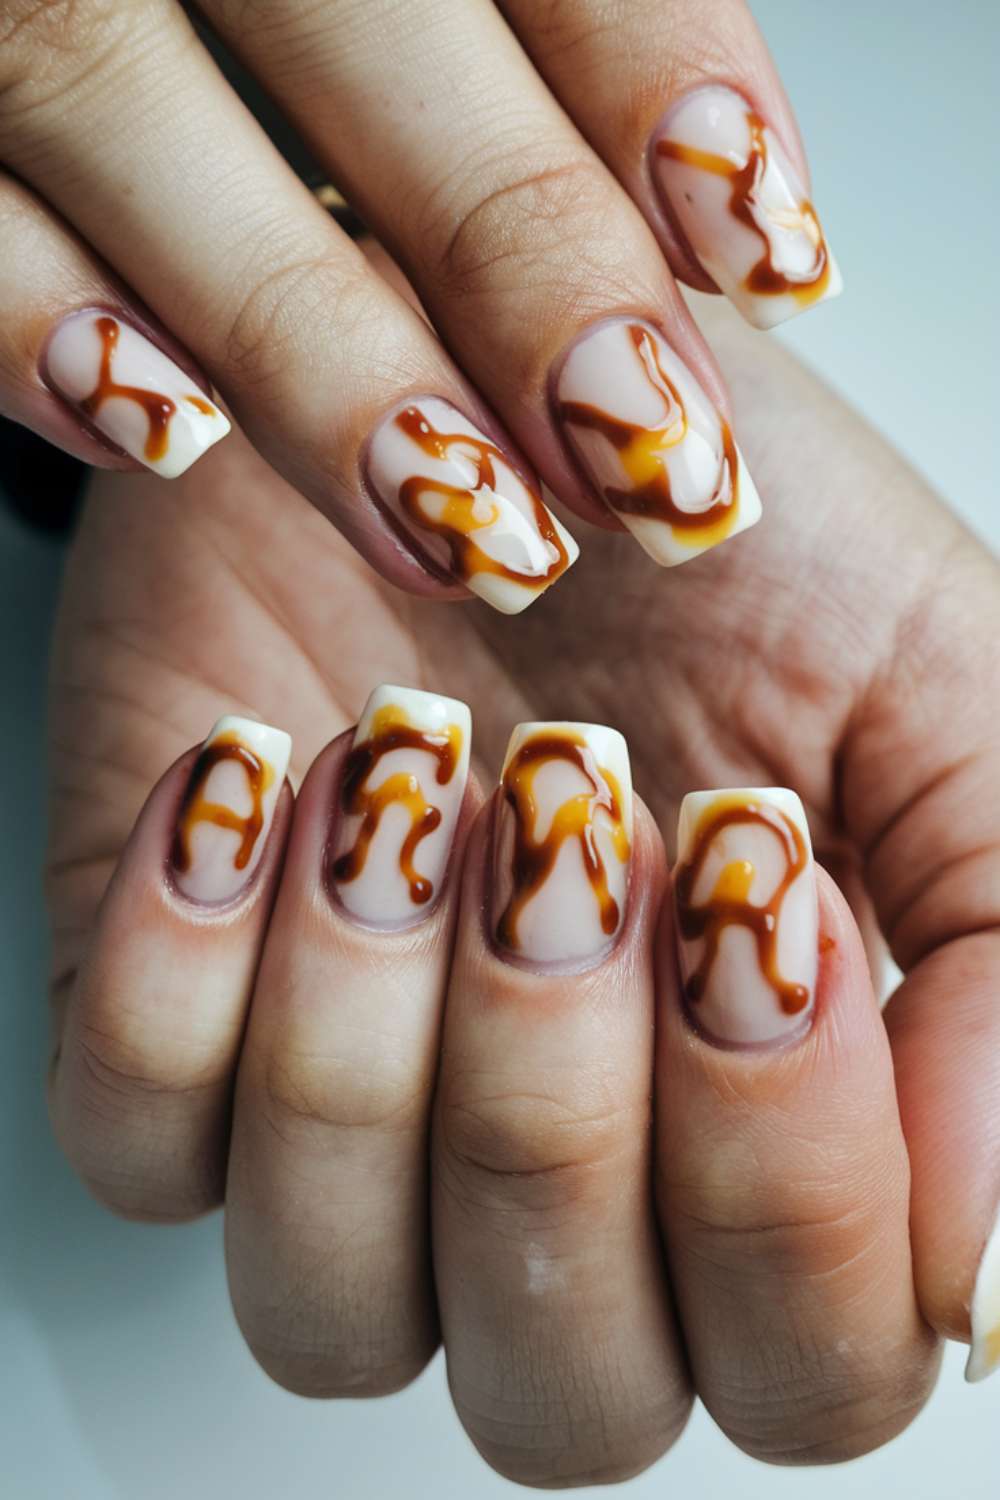
Step-by-step
- Start with a creamy base in a soft caramel shade.
- Drizzle a slightly darker caramel polish in artistic patterns.
- Use a fine brush to add delicate details and swirls.
- Complete the design with a clear top coat for a glossy finish.
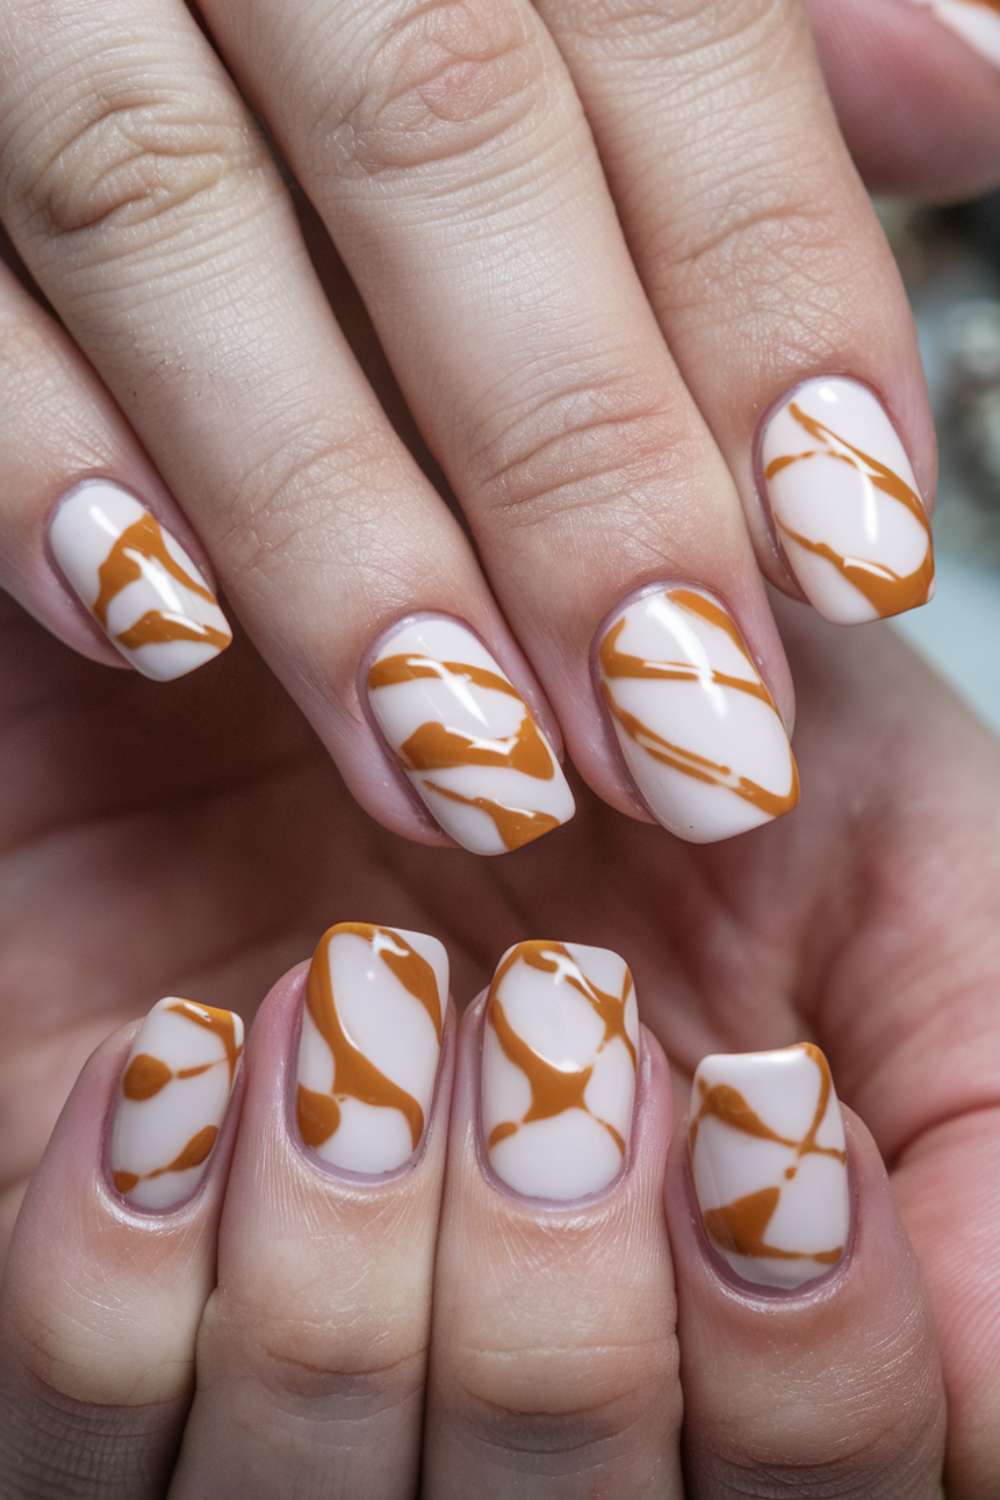
Picture this: Imagine your nails adorned with artistic drizzles of caramel that evoke the indulgent sweetness of a fall dessert. The soft, creamy base serves as the perfect backdrop for the intricate caramel patterns. Each nail becomes a delectable masterpiece, inviting you to savor the beauty of the season.

14. Moody Mulberry Magic
Step-by-step
- Apply a rich mulberry or deep plum base.
- Use a fine tip to draw minimalist abstract shapes.
- Incorporate hints of silver or light purple for contrast.
- Seal with a top coat to enhance the design’s depth.
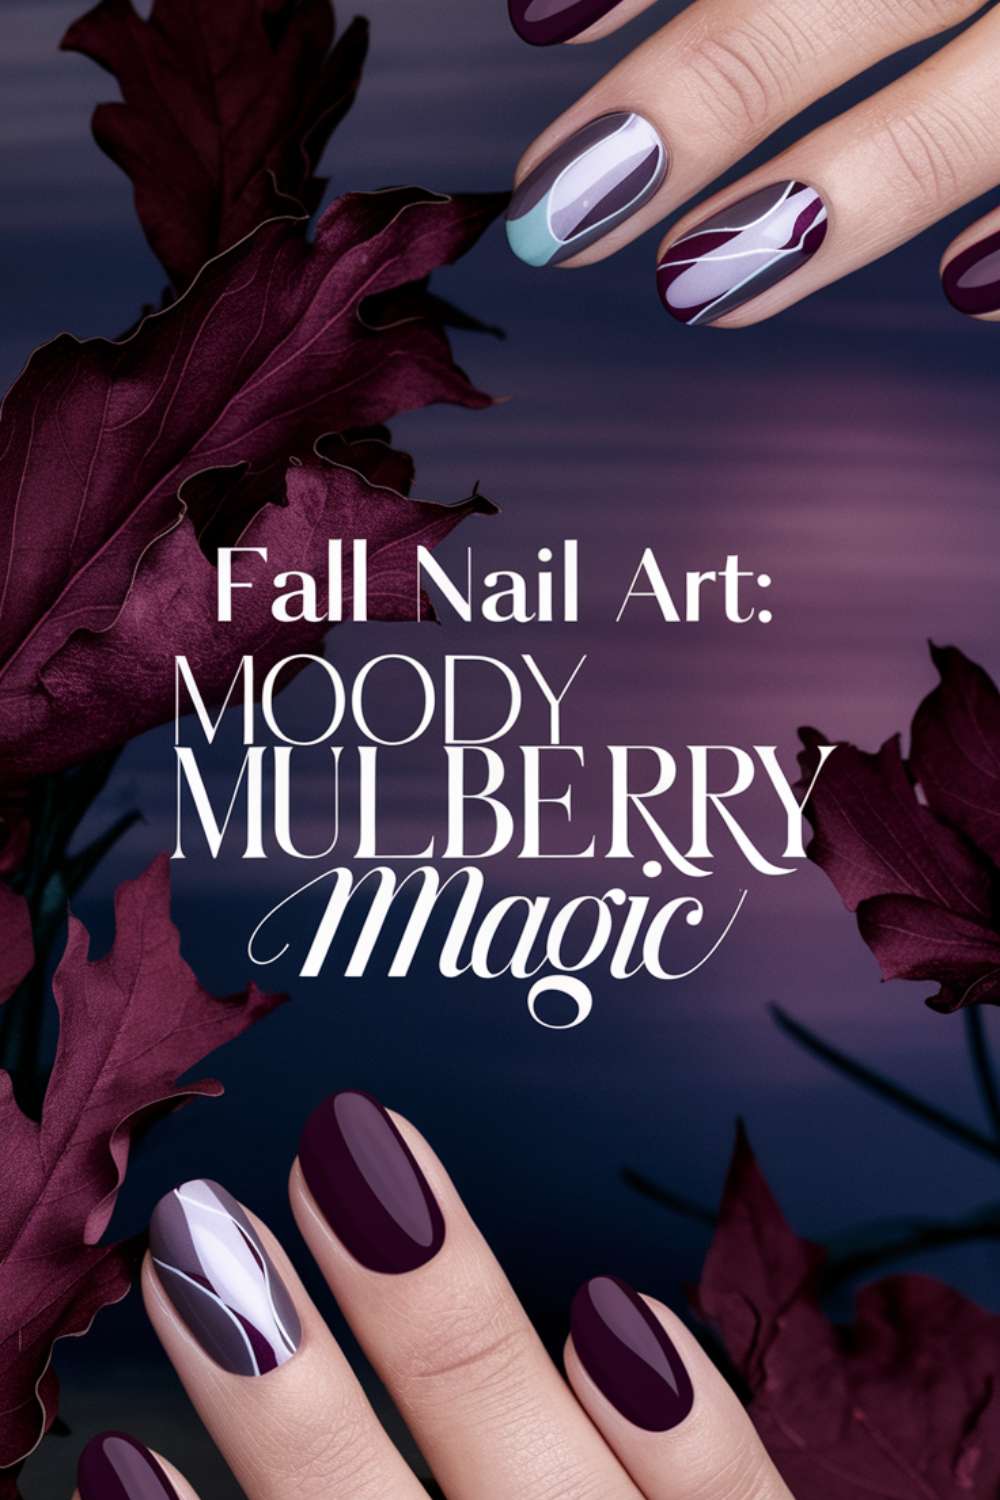
Picture this: Picture your nails enveloped in a deep, moody mulberry shade that exudes sophistication. The minimalist abstract shapes add an element of modern flair and intrigue. Each nail tells a story of elegance and mystery, perfectly capturing the mood of a fall evening.
15. Soft Cinnamon Swirls
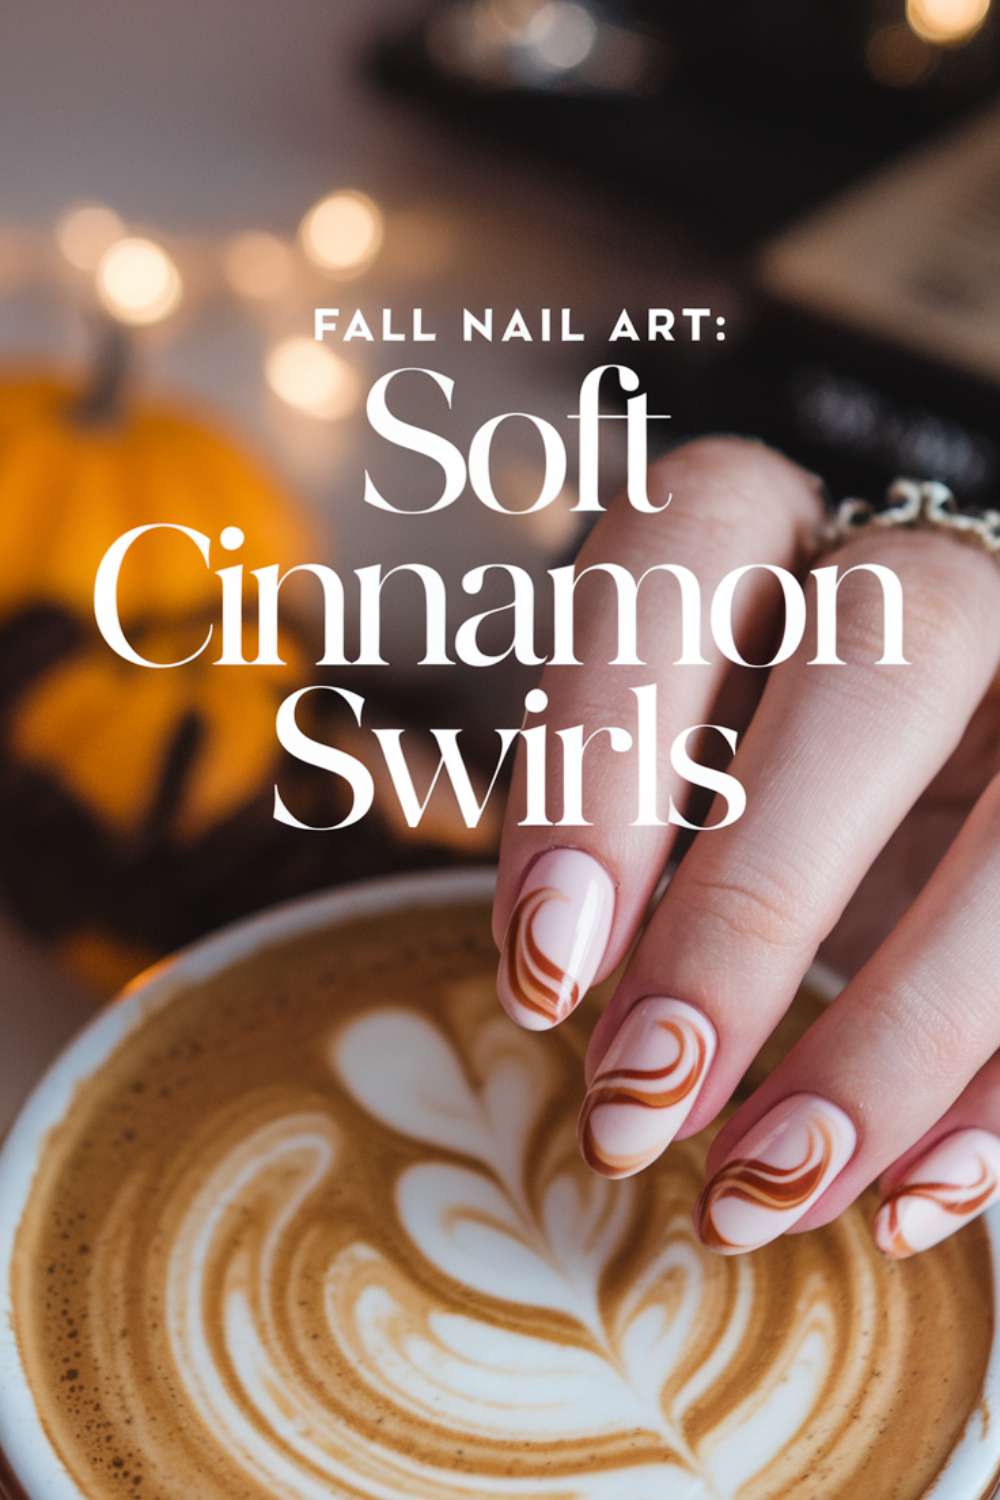
Step-by-step
- Choose a light, creamy base that resembles a smooth latte.
- Create swirling patterns in a rich cinnamon color using a thin brush.
- Add soft gradients to enhance the swirl effect.
- Top it off with a clear gloss for a silky finish.
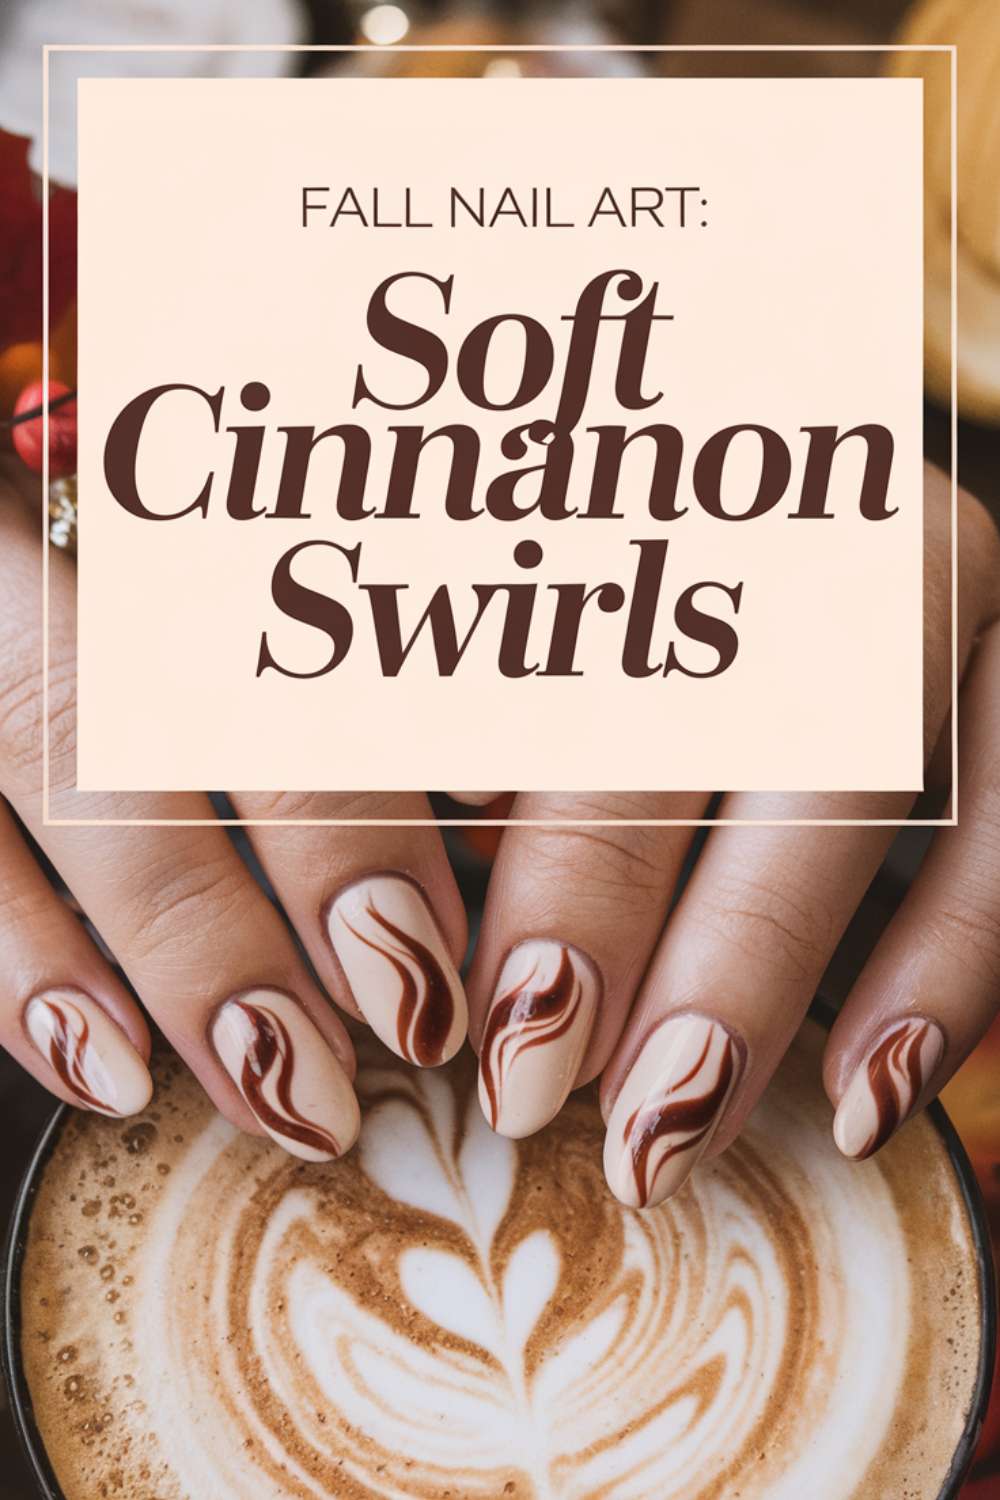
Picture this: Imagine your nails showcasing gentle swirls of cinnamon that blend effortlessly into a soft, creamy backdrop. The design is reminiscent of a freshly stirred cup of fall-flavored coffee. Each nail radiates warmth and comfort, inviting you to relish in the cozy spirit of autumn.
16. Vibrant Autumn Mosaic
Step-by-step
- Begin with a neutral base that serves as a subtle canvas.
- Add mosaic-like pieces in various fall colors using small stencils.
- Layer the shapes to create a dynamic, multi-dimensional effect.
- Seal the masterpiece with a clear top coat to unify the design.
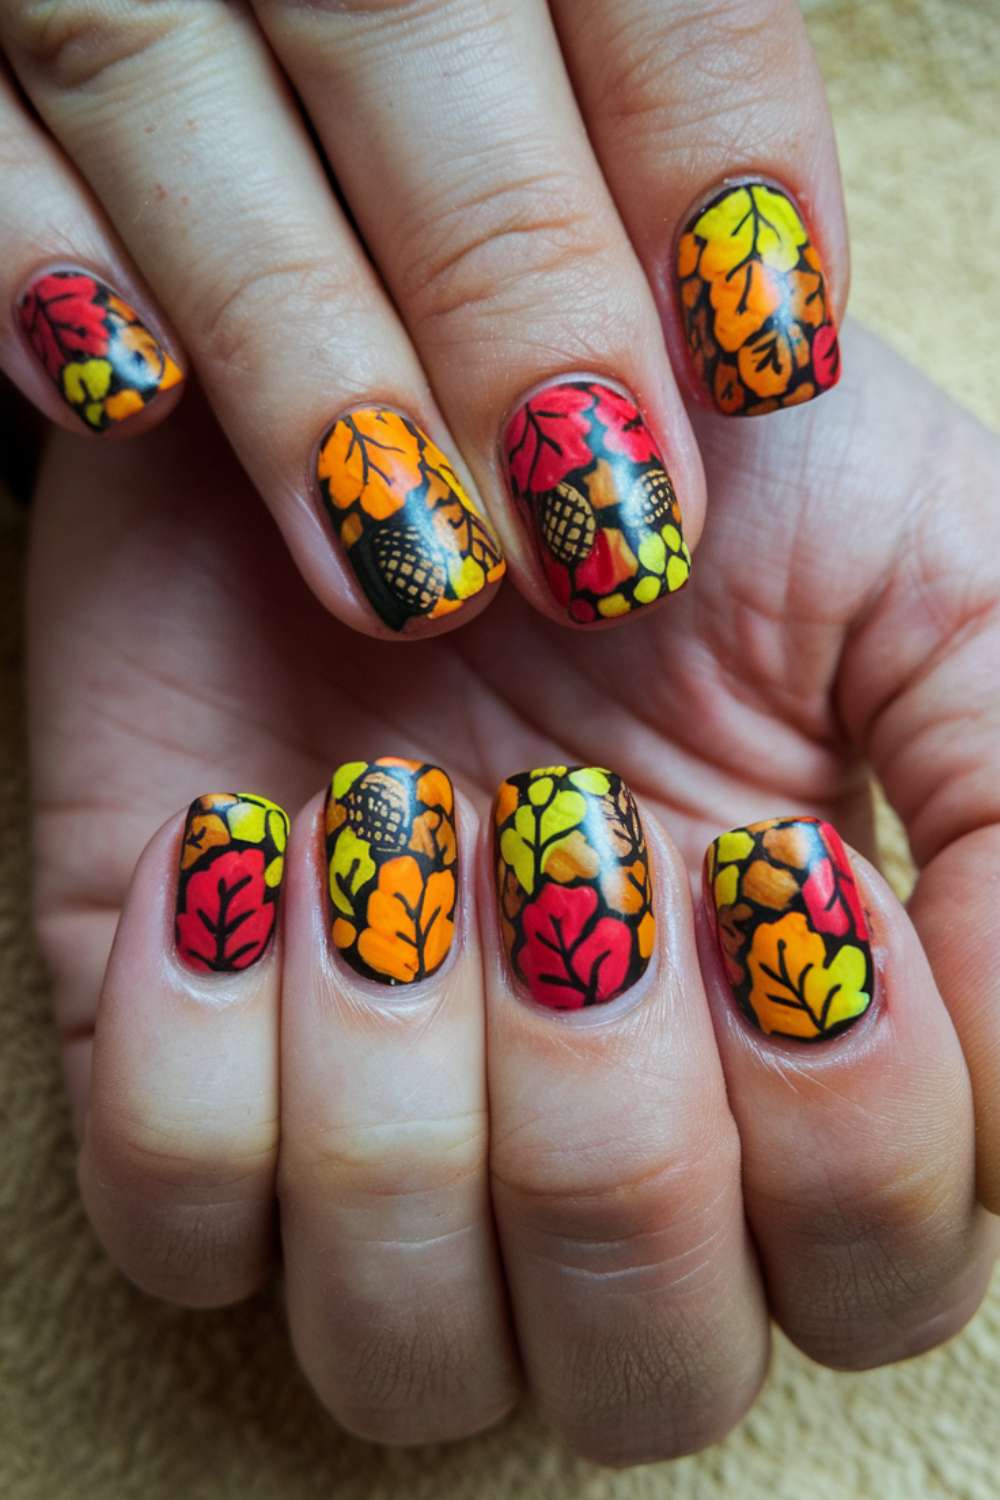
Picture this: Visualize your nails as a vibrant mosaic of autumn hues, where each piece tells a story of fall’s colorful tapestry. The careful arrangement of shapes and shades creates a harmonious yet dynamic look. Each nail becomes a celebration of the season’s diversity, bursting with energy and creativity.
Enjoy these creative ideas and let your nails be the canvas for your autumn-inspired artwork. With each step, you’re not just painting your nails—you’re capturing the essence of fall in a style that’s both simple and irresistibly cute. Happy painting!
Other Articles

15 Simple Summer Nail Art Trends for a Cool and Chic Look
18 Creative Gel Toe Nails Designs and Cute Toenail Inspirations


